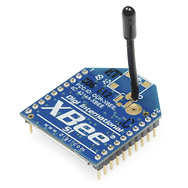
After creating libraries to get the DHT11 working, we could get output over a serial USB connection. The next step is to extend the serial connection over a wireless connection. Extending to wifi will come later, first we have to work with the Xbee connection.
Originally, when I bought my Xbee antennas, I thought they were designed to connect with wifi hotspots and networks. Nope. While they use the same frequency range as wifi, they actually use slightly different frequencies and channels. The plus side is they *just work* quite nicely. Additionally, they can be configured to work with just specific other Xbee antennas, based on addressing. Check out the Wireless Shield page fore more info.
After getting the serial test working in that blog post, I took 2 Arduinos and attached a Wireless Shield to each. Then I attached a wifi Xbee shield to each of them.
I attached one to my PC, and put the other in my fridge. Say hi to my pickles!
Once I got the USB connection to recognize the Arduino, simply clicking on the Terminal tab in X-CTU brought up the same humidity and temperature output as was reading over the serial monitor. The serial connection is happening literally over the wireless. This is cool.
It takes a little while for the sensor to cool off, but it was reading 2.0C reliably for a while. This image is from a later demonstration. As you can see, the temperature and humidity readings eventually trail off into a series of "Ready"s, which are the Arduino rebooting. It's running out of power. Magically, if you take it out of the fridge, it'll start working in about 5-15 minutes, as the battery warms up and can start generating electricity again.
---
As I was writing this, my 2nd Arduino, the PC model, has stopped working. It no longer shows in the Arduino IDE nor X-CTU, but still does in Device Manager. This is the 2nd Arduino I've broken, and it's putting a serious crimp in my development abilities. I suspect I'm causing small amounts of electrostatic shock to damage the internal circuits. Still frustrating.


